Sunday, 10 May 2009

The Final Film

Without further ado, I present the final completed film 'Kakapo'

Overall I'm a little uncertain how I feel about the final film, but I'm generally positive in my opinion. I am proud of myself for not only completing the film, but also doing so well within the deadline. There are few edits that I would like to make, and am seriously considering making them for the degree show. 

I am glad that I stuck to the 2D medium for the film, as I think it gives the piece an appeal that CGI sometimes lacks. I also think it helped me to not be slowed down by technological hurdles. However, that being said, I am now starting to seriously consider making a move over to CGI, now that I feel my animating skills are a lot stronger and after having worked closely with it for my set.

Regardless, I am proud of this film and I feel I worked my hardest to get it completed.

Music

Here is the music that I have chosen for my film, which you will recognise from my animatic
The title of the song is Spring Morning 3 by De Wolfe Music. The music  is royalty free and was obtained from the Media Departments extensive royalty free music library.


I like this piece of music, as it both captures the light heartedness of the vignette, as well as the peril that the character is placed in. I also like how the classical music evokes thoughts of old cartoons from the 1960s/1950s.


Compositing the Film

Now that I have all my animation completed, as well as all my renders for my set, all that remains is to combine the two elements into one. To do this, I firstly need to place a blue or green background onto the animation, which can be keyed out using the Key lighting tool in After Effects. See below for example.


The reason I need to add a colour to the background, is because the default background colour on ToonBoom is white, and if I use the key lighting tool to remove this in after effects, well it not only removes the white from the background, but also the white from the Kakapo's eyes and the Owl's body. I chose blue for most scenes, but green on scenes with the Pigeon because the blue was a tad too close to its own colour scheme.

Below is the same scene, after the keylighting had been used to remove the background colour.


The process needs tweaking, but I'm happy with the results, and hopefully bar two scenes that require more advanced editing, the compositing process shouldn't take up too much of my time.

Working with Jo and Tim

For my film, I asked Jo Raithby if she could colour two scenes for me on ToonBoom. She accepted, and as evidenced in her own blog, she completed the task to the full. She was all set to deliver the work to me, when unfortunately she fell ill, also documented in her blog.

Because of this, I felt that through not fault of her own, Jo would not be able to deliver the work to me in time to fit my own schedule. Therefore, I elected to colour the two scenes myself, which took very little time and allowed me to start properly compositing a lot earlier. Jo will still get credit in the film for doing the work, because she did it even though I ended up not using it.

Below are the scenes in question, coloured by myself.


On Thursday, Jo requested my aide when it came to cameras and helping her render. Originally I was to set up the render on my own home computer to help speed things up. However, this plan fell through when my computer's copy of Maya unexpectedly started crashing repeatedly. This seems to be an issue with Maya itself, as I encountered similar problems with Matt Evans work a few days before.

Therefore, me and Jo used the studio computers to render her work. I also set up the cameras angles for Jo, who asked for my help with them because she felt my understanding of camera angles was stronger than her own.

This week I also recieved the work that I asked Tim Storrow to do for me. In my film I have multiple shots of a book with the pages turning. I requested that Tim Storrow do these for me in Maya in order to lighten my own work load and make things a little easier on myself. Tim did exactly as I asked, and the only issue of note that cropped up was the rendering, where Maya for no apparent reason would refuse to render the toon lines, necessitating that I restart the entire computer and render again. This only seemed to happen on the university Macintoshes, and was not an issue elsewhere.

Below is an example of one of the page turns:


This completes all of my work regarding the Client Oriented Practice and Team Production unit of the course. Throughout my blog you will see all the cases where someone worked on my film or I worked on theirs clearly documented. I personally feel that I was very lucky with the people I worked with. Every one exceeded my expectations and delivered to the deadline on time.

Friday, 1 May 2009

Line Up for Dave

I asked Dave to animate the background characters in my film in the shots they feature heavily, mainly because I felt that I did not have time to do it myself, but also because I felt that it would make things feel richer (nothing makes things look fake like cardboard characters). I also had great faith that Dave could deliver the work to a standard I'd be pleased with.

He exceeded my expectations and I could not be happier with the work that he gave me.

The only issue that did occur with this is that originally I had requested Dave to animate the background characters in another scene that I did (see his blog for the scene in question). However, because of time constraints and it not being 100% necessary to the film, we agreed to forego it.

Overall, I'm happy with it and thankful Dave could do it for me.

Susan's Model

For my film, Susan Bell made me a small model of the the central character, so I could use it for reference. Below are a selection of photographs of the finished model.


I felt that Susan did a very good job with this, especially considering certain aspects of the character make it difficult to translate into 3D (the hair in particular I felt she did a wonderful job with).
I found this useful to have as reference, and nice to have.
Thanks

Work from Dan

Hello all

As part of the requirements for the course, I handed out jobs for people to do on my film. One of the major areas this included was the task of colouring in my work. I already uplaoded what Laura did for me, and today I recieved the two scenes that I asked Dan Wilkinson to colour for me.

An issue arose with the above scene; because I had not made it clear that the white band across the pigeon's beak was meant to be white, I recieved it back black. This was an easy problem to solve, taking only a few minutes to do so and was not the fault of Dan.

Overall I am pleased with the job that Dan did on these, they look great.

On another note, keen observers will note that the pigeon's wings were a blue colour in my concept art, whereas here they are grey. Why was this changed? Mostly because I felt that it made drawing and colouring the character overly complicated, and on top of that, I felt that the character only really needed two core colours (red and grey) and a third was unnecessary.

Anyway, that is all for now.

Compositing awaits.

Monday, 27 April 2009

Thorns from Joe


Last week I asked Joe to model the thorns in my set for me, mostly because I became aware that the idea of making the thorns a plain with a texture on it was;

a. Stupid
b. Time consuming
c. Going to kill my rendering time

So I asked Joe to model me some thorns by today, and above is the result of his work. I felt Joe did a good job, and I am pleased with the results. I will now work on putting the thorns into the set, and adding finishing touches to it.

I hope to be rendering by Wednesday.

Addition:

Upon importing the mesh into my set, I discovered that the combination of my set and the mesh of the thorns, resulted in the computer slowing down, making it difficult to move around in Maya.

Luckily, Jo Raithby pointed out the Reduce tool on Maya, which I used to get this:


Unfortunately this has resulted in a loss of quality compared to Joe's original mesh, but is a sacrifice I feel necessary in order to make working on the set easier on myself, as well as to speed up the rendering process.

Texturing my Set

Okay, I have been playing around with textures on Maya and Photoshop, and below are the fruits of my labours.


As you can see, the set is looking a tad flat at the moment, but I intend to rectify this by adding more detailed shading to the textures. Also glaringly missing are the thorns upon which my lead character meets his untimely (but bloody hilarious) demise. These are being modeled by Joe Cornell, who tells me he will have them sent to me very soon.

Also, for clarification, the grey blocks are to represent the characters in the set, in order to help me plan my camera movements more accurately.

Back to the grindstone...

Colour Done

Below are some samples of my final animation in colour, which I completed this weekend. The colouring stage is now nearly complete, with only the colour work from other students needed to be done before I can sign the entire colouring stage off.


With my side of the colouring stage finished, I can now move onto putting the finishing touches onto my CGI set and getting it ready for the rendering stage.


Tuesday, 14 April 2009

Filming Reference

I figured I should upload this, despite any embarrassment is may cause me.

Below are some samples of the reference I filmed for different points in the film.

Enjoy my grace and beauty.


Wednesday, 18 March 2009

Work from Laura

Okay, as mentioned previously, I intend to use some other in the class as colourists in my film. Well, seeings as I no have a healthy backlog of finished animation, I decide to hand out some of the scenes to Laura Tait, as you may have seen on her blog.

Here's one of them, I'll upload the rest when I have more time, I promise.

Enjoy the fruits of Laura's labour!

Jenn's Set

Well I got my set back from Jenn Hanely, and needless to say she did a fantastic job (especially considering all teh tiny tweaks I asked her to make like the fussy git I am.)

With the set on hand, I ventured back into the wilderness that is Maya, and started texturing. At first I intended to use a toon shader, so I could get black outlines, but the black outlines slowed everything down and were tempramential to say the least. Instead, I did away with the black lines, and instead simply like the toon colours with an ambient light and the results... well I let the video speak for itself.


I still need to put in the thorns and mountains to fit my concept, but otherwise that's pretty much done, ready to put in cameras and render.

However then came a crushing question: what if it didn't match my animation?

Well, seeings as if this was the case I'd have to draw my backgrounds, I quickly rendered out a approximate camera angle to what I wanted for a shot, and composited the image into the background of a piece of completed animation.

The result is below:

Luckily, it seems to work well together, and I have options if later on I decide against it.

Now all I need to do is finish my animation...

Peace out

James

Tuesday, 10 March 2009

Planning out Animation

Okay I decided to sit down today and make a chart of what animation needs to be done to finish my film, whose doing it and what I've managed to get done. Green squares mean it's done, red means it's pending.

Yeah that's ALOT of red you can see there.

Panicking? Not really, just driven to work harder.

And away I go.

Wednesday, 4 March 2009

Boiling Fixed

Hey!

Remember my animation?

Remember how the lines wobbled like a ladybird standing on one leg?

Well I fixed that, check this out.

Now the animation isn't 100% finished, but this is more about the lines than anything. Basically after months of working on Toonboom, I remembered that you can select lines. I also remembered that if you can select something, u can copy and paste it.

After realising this, I decided to see what it would look like if instead of tracing over lines when something doesn't move, like here the character's head and body dont move much at all, so I just pasted the lines on a new layer, and drew in what mvoed, rubbing out and redrawing on the rest when needed.

The result? Well my lines don't boil, which majority of people prefer.

...I actually prefer it with a bit of boil, but enough people have said they prefer without, and this was saves time. So this what I'll be doing from now on (have already gone and fixed some previous scenes that were, as the Hobbits say, screwed Mr Frodo) and no doubt I'll stop being a whiny git and learn to like this way.

I'm off to battle evil

and by that I mean animate

Go me, master of bizaare segues.

Friday, 27 February 2009

Duck and Robin Turnarounds

Hey guys, just a quick upload with some stuff that slipped my mind totally, turnarounds! Here are the turnarounds for the Robin and Duck characters.

Monday, 16 February 2009

Overlong Animation

I promised myself I wasn't going to just keep uploading scenes as I do them, 'cause it'll make watching the film at then end for anyone watching this incredibly boring. However this is an exception.


You see, I had originally intended for this shot to only be a couple of seconds long (indeed, I believe the original should have been uploaded earlier and is on here somewhere) but I kinda... went overboard. I planned out too many little movements and shifts, and... well, that 2-3 second scene ended up clocking in at over 16 seconds.


I can't see me using all of this in the final film (the final film is geared to be between a 1 min and 1 min 30, for cupcake's sake!) so here it is it's complete, unedited glory!


(P.S. I'd be interested to hear what part people like the best, to help me choose a section for the final film.)


Thanks y'all!

Tuesday, 10 February 2009

First Completed Animation Scene

Okay that title may be a tad deceptive, this is by no means what this will look like when I'm finished, it still needs colouring, compositing, sound and stuff, but the animation you see here will be what you'll see in the completed film.

There's a few issues here and there, especially the boiling which I'm struggling to deal with. I'm thinking that may just be how my film looks which sucks but I'm trying like hell to deal with it.


Friday, 16 January 2009

Everytime a bell rings a Kakapo gets its wings!


After the crit session we had for our animatics, I made a few changes which I will go into greater detail in later. For now, here's some concept for something Pual suggested, which was showing the Kakapo as an angel to show it gets its wings at the end. I may use this as an ending still, we shall see...


Tuesday, 13 January 2009

Final Animatic

Our upload of our final animatics are tomorrow, and I've decided to upload my final animatic onto here. This animatic MAY get updated again between now and tomorrow, but more than likely, this is the final one.


Animation Tests and other such things

Now I'm done for now with other peoples work, I've gotten back to working on my project 'Kakapo', by doing three pieces of test animation, each of a scene from my film. These pieces are by no means final, a few tweaks in the motion and timing are needed in some places, but I'm trying to start animating earlier, as to avoid running out of time further on down the line.


Wednesday, 7 January 2009

Storyboarding for Tim

Well another new year is upon us, and with it comes more work. I'm currently working on a final animatic which will be uploaded around the time I finish the thing, but for now I can tell you that I have finished my assignment that Tim gave me.
Tim asked me to do his storyboards for him, a task I happily took on. Tim and me sat down over the course of a few days to plan out the rough thumbnails for the storyboards, which I wont upload because a. it gives you less to scroll through and b. some of the drawings are less than respectable.

After the thumbnails were finalised, I went off and spent a day or two drawing out the final images for Tim. Tim then looked over them and gave me any corrections that needed doing, and I then fixed accordingly.

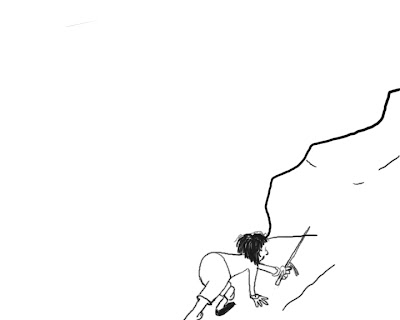
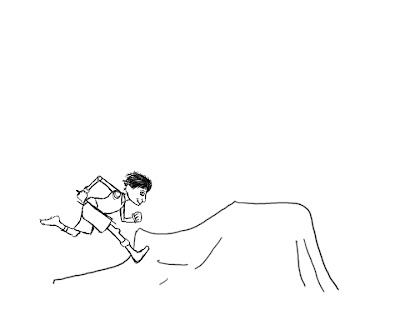
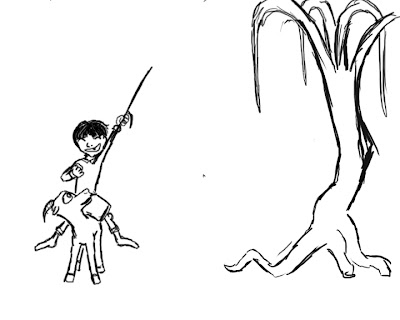
I actually rather enjoyed working on these panels, mostly 'cause it gave me a chance two more challenging characters (the goat and the boy), and so I hope Tim is happy with them.
Go over to Tim's blog to learn more about his film.